Free backup for your website on WordPress
Backup has been and remains the last step to protect your site when other methods have achieved anything. Every blogger / webmaster must have a backup of your creation. On this page I will explain how to keep your content safe.
There is a very good program BackupBuddy , Of course it costs money and creating backup manually will take time, but if it were so grim, I would not write about it here, it is possible to use some of the program for free and more than that, do a full backup to the cloud on schedule!
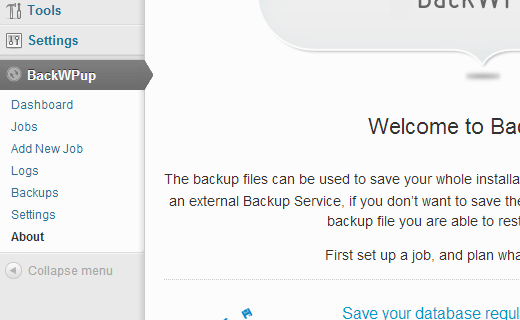
The first thing you need to do is download and install the plugin for WordPress called BackWPup After activation window will appear and the salute will be added to the sidebar tab BackWPup.
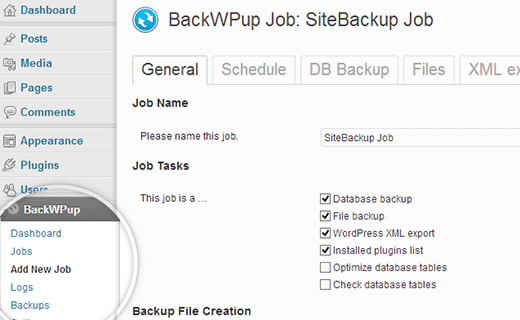
Click on the Add New Job to create an automatic backup for your website, on the General tab, specify a name for this backup, the name will help in the future to find that what we have done now in the program. The description will include a backup of the database and backup files, export WordPress XML, a list of installed plug-ins as well as the optimization and validation of the database itself. If there is a need for a simple backup of your site then you can select all of them except for checking the database and its optimization.
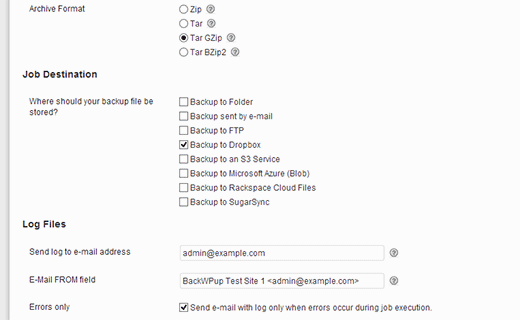
After selecting the above section, select the type of backup, the default is tar.gz but if you want it can be a zip archive. The following section will see the Job Destination is the option to select your backup storage, you may want to send backup via email or save for ftp, make a backup in Dropbox, amazon S3, Windows Azure, Rackspace or SugarSync. But of course it is not necessary to back up directly to the server where the site is located, or the meaning of backup is not clear. For example, let’s choose Dropbox.
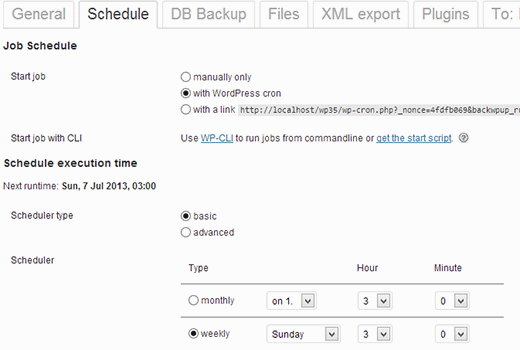
Now let’s do the schedule backup. Click on the tab Shedule and choose how often you want to back up, perhaps you’ll want to do it by hand, this option is also available. But for beginners, I would recommend making a backup of a daily or weekly basis.
What exactly should be included in the backup? It is of course up to you, click on DB Backup and put a tick in the required fields, but keep in mind that your choice will depend on the size of the future backup. If you are completely confused and did not understand, then put all the checkboxes to miss nothing.
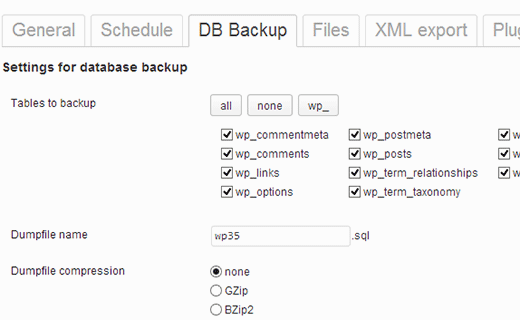
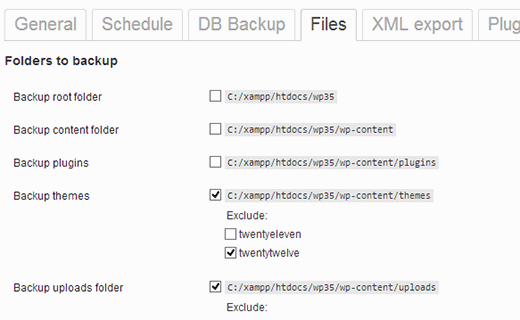
On the Files tab, I would not recommend making a backup of the kernel files WordPress, it is enough to tick Backup root folder, sometimes create their own plug-ins folder inside the wp-content papkidlya store their data, if you want you can also disable these folders.
Save the backup to Dropbox. Depending on vyshego choice for storing backup you will see a tab with the name of the destination folder in my case the folder to Dropbox.
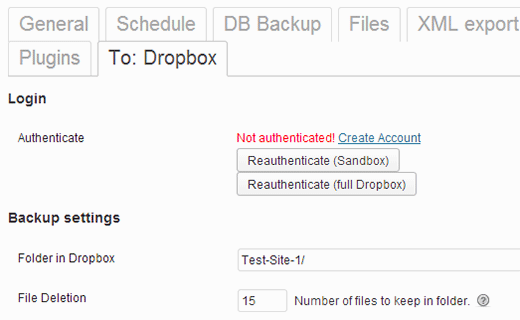
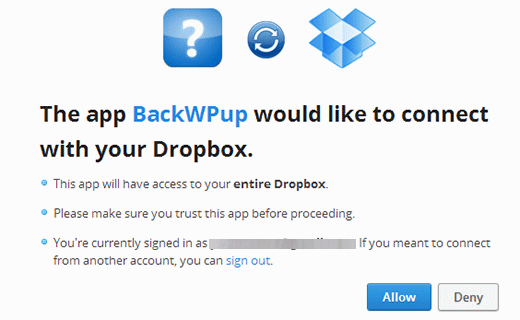
click on Reauthenticate (full Dropbox) during the transition to Dropbox website you must enter your username and password to sign in, then need to confirm the request for the program BackWPup access your DropBox account
You can create multiple backup jobs using BackWPup. For example, you can create daily, weekly backup, backup running manually backup database only. Each of the tasks that you have created will be displayed on the page of BackWPup Jobs, and each task can be started by clicking on the link under the title, you can also amend the settings or remove the problem in the backup.
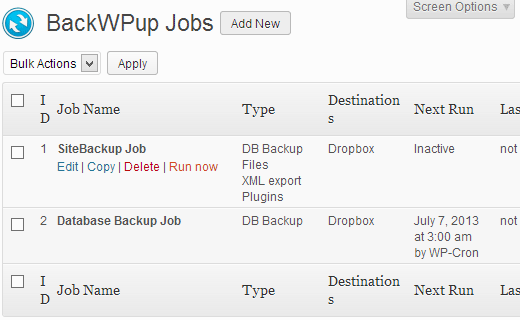
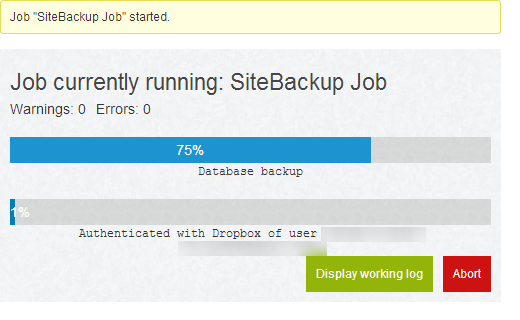
When for instance you run the backup manually, by clicking on the link Run Now, you will see a progress window, and click on the Display working log’ll see what happens in the background, and if for some reason the backup has failed it is here you can find out the reason. You can also stop the backup by pressing the abort.
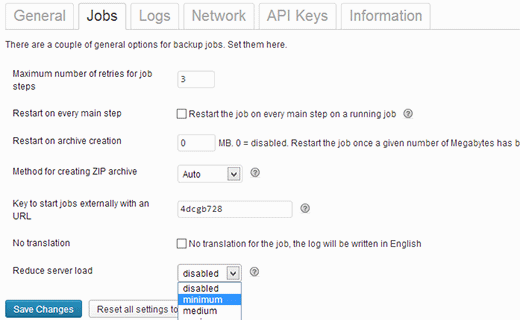
Problems that may arise. Starting the backup using BackWPup can provoke strong load on the server, and depending on its capacity to slow or paralyze its work, as some hosting providers set a limit within which the script can be executed, and when the server is stopped to reset BackWPup also take a pause in 5 minutes and then resume the process. The first thing to do – increase the limit PHP memory, then go through the tabs BackWPup * Settings * Jobs and add the Maximum number of restries for job steps option. By default, the tab has a value of 3, for example, can be increased to 5 and see how it will work for you. You can also scroll through the options Reduce server load and select the values medium or minimum.
So, you met with a wonderful free plug BackWPup, but then the question arises: why do people pay money for the backup plug-ins or BackupBuddy VaultPress? One reason for this is technical support, because when you pay for a product that is guaranteed to get tech support, another reason – the presence of the scanner to check for viruses and malware in paid programs that I use Vaultpress because it is 100% customizable service, backup is stored them in the cloud and you can easily restore all the data in a couple of clicks.
But if you have hands grow from the right place you can teach all of this for free, so do not wait until your site will infect with malware, make a backup now, because the clock is ticking. I hope this post will help you set up an automatic backup, waiting kommenitarii below.